Amigurumi Otter Crochet Free Pattern
Designer: Ekaterina Craft
Instagram: @ekaterina.craf
Hello dear friends...
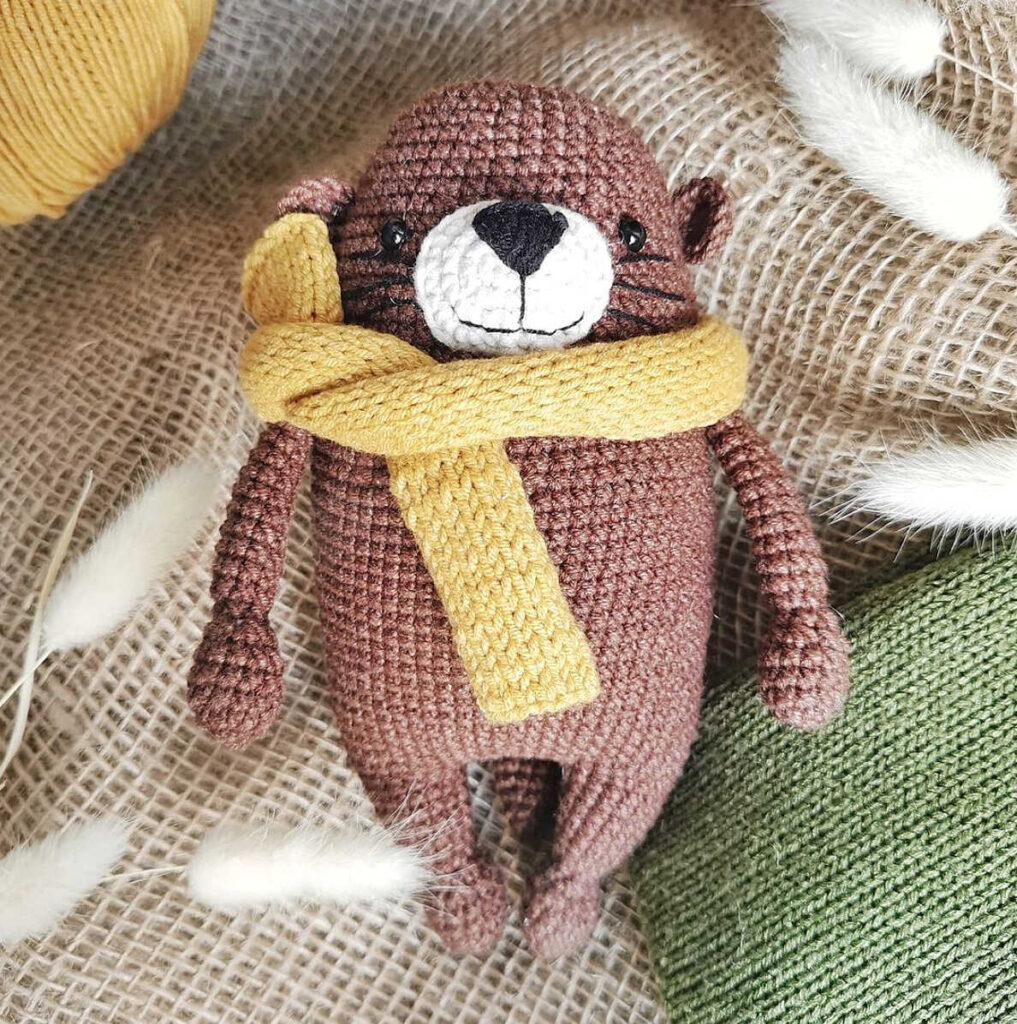
One of the free amigurumi crochet patterns we will share today is the amigurumi Bruno the otter, whose photos and design belong to Ekaterina Craft. You can learn how to crochet these otter using the free amigurumi pattern. Thanks to Ekaterina Craft for this cute otter.

Amigurumi cats, amigurumi dolls, amigurumi dogs, amigurumi unicorns, amigurumi lambs, amigurumi dinosaurs, amigurumi foxes, amigurumi bears, amigurumi giraffes, amigurumi pigs, amigurumi birds, amigurumi penguins, amigurumi panda, amigurumi llama, amigurumi bunny, amigurumi clowns, amigurumi elephants, amigurumi hippos, amigurumi monkeys will not be difficult for you…
Materials and tools
– YarnArt Jeans yarn, main color 70 (brown), a little milk yarn, I have YarnArt Jeans 05, for the face, as well as black yarn for embroidering details and yarns of any shade you like for a scarf
– eyes on a secure fastening with a diameter of 5 or 6 mm (you can also choose sewing eyes of the same size if the toy is not intended for children)
– hook number 2
– knitting needles number 3
– needle for sewing on parts
– Filler (synthetic fluff, holofiber or their analogs, whatever you like)
– marker ( for the convenience of marking the beginning of the row, if it is not there, you can use a thread of a contrast color)
– scissors – sewing pins (for the convenience of assembling the toy)
– good mood and inspiration
Abbreviations
sc – single crochet
mr – magic ring
inc – increase
dec – decrease
(12) = number of stitches you should have at the end of the round/row
(…) – repeat whatever is between the brackets the given number of times

AMIGURUMI OTTER FREE PATTERN
Legs:
1. 6 sc in mr (6)
2. (1 sc, 1 inc) × 3 (9)
3. (2 sc, 1 inc) × 3 (12)
4-5. 12 sc (12) Gradually add the Filler, then it will be difficult to do it.
6. (2 sc, 1 dec) × 3 (9)
7. (1 sc, 1 dec) × 3 (6)
8. 6 sc (6)
9. 6 inc (12)
10. 12 sc (12)
11. (3 sc, 1 inc) × 3 (15)
12-14. 15 sc (15)
Cut the thread
We knit the second leg in the same way, but we do not cut the thread, but continue to knit. We collect 6 ch and connect the two legs together (knit the 1st column of the first row of the body into the first free ch on the second leg)

Body:
1. 15 sc on one leg, 6 sc on one side of the ch, 15 sc on the second leg, 6 sc on the other side of the ch (42)
Put the stamp on the last ch of this row, this will be the beginning of the next row.
2. (5 sc, 1 inc) × 7 (49)
3. (6 sc, 1 inc) × 7 (56)
4-9. 56 sc (56)
10. (7 sc, 1 inc) × 7 (63 )
11-21. 63 sc (63)
22. (7 sc, 1 dec) × 7 (56)
23-32. 56 sc (56)
33. (6 sc, 1 dec) × 7 (49)
34. 49 sc (49)
35. (5 sc, 1 dec) × 7 (42)
36-38. 42 sc (42)
At this stage, we insert the eyes between 33 and 34 rows at a distance of about 10 columns from each other. Don’t forget to stuff the toy.
39. (4 sc, 1 dec) × 7 (35)
40-41. 35 sc (35)
42. (3 sc, 1 dec) × 7 (28)
43. (1 sc, 1 dec) × 9 (19)
44. 9 dec, 1 sc (10)
45. 5 dec (5)
Pull the knitting edges (you can see a convenient way in reels on my page) and hide the thread.
Arms (make 2):
1. 6 sc in mr (6)
2. 6 inc (12)
3-5. 12 sc (12)
6. 6 dec (6)
7. 6 sc (6)
8. (1 sc, 1 inc) × 3 (9)
9-19. 9 sc (9)
We fill the handles less than half, so that they do not puff up after sewing. We fold the handles in half and knit 4 sc for two walls, leave the thread for sewing.
Ears (make 2):
1. 6 sc in mr (6)
2. 6 inc (12)
Do not forget to leave the thread for sewing the ears to the head.
Tail (do not stuff):
1. 6 sc in mr (6)
2. (1 sc, 1 sc) × 3 (9)
3. 9 sc (9)
4. (2 sc, 1 sc) × 3 (12)
5. 12 sc (12)
6. (3 sc , 1 inc) × 3 (15)
7. 15 sc (15)
8. (4 sc, 1 inc) × 3 (18)
9- 12. 18 sc (18)
13. (5 sc, 1 inc) × 3 (21 )
14-16. 21 sc (21)
17. (6 sc, 1 inc) × 3 (24)
18-19. 24 sc (24)
Fold in half and knit 12sc for both walls.
Muzzle
(we knit with yarn of a different color):
1. 5 inc
2. to the second from the hook 3 sc, 3sc in 1 ch, 2 sc, 2 sc in 1 ch (10)
3. 1 inc, 2 sc, 3 inc, 2 sc, 2 inc (16)
4. 2 inc, 3 sc, 4 inc, 3 sc, 3 inc (24)
5. 1 sc, 3 inc, 4 sc, 2 inc, 3 sc, 2 inc, 4 sc, 1 ss.
(we do not complete the row). We leave the thread for sewing.
Scarf:
Knit with size 3 knitting needles, cast on 14 ch, then knit with the front stitch to the desired size. I got about 30 cm. If you do not know how to knit, it’s okay, you can crochet a scarf. To do this, dial 15 inc and in the second from the hook, start knitting sc to the end of the row. Then, in rotary rows, complete the entire fabric of the scarf of the required length.
Assembling
– Sew on handles between 24 and 26 rows of the body, at an angle. In order to do this as evenly and symmetrically as possible, first secure the handles with pins and only then sew with a thread.
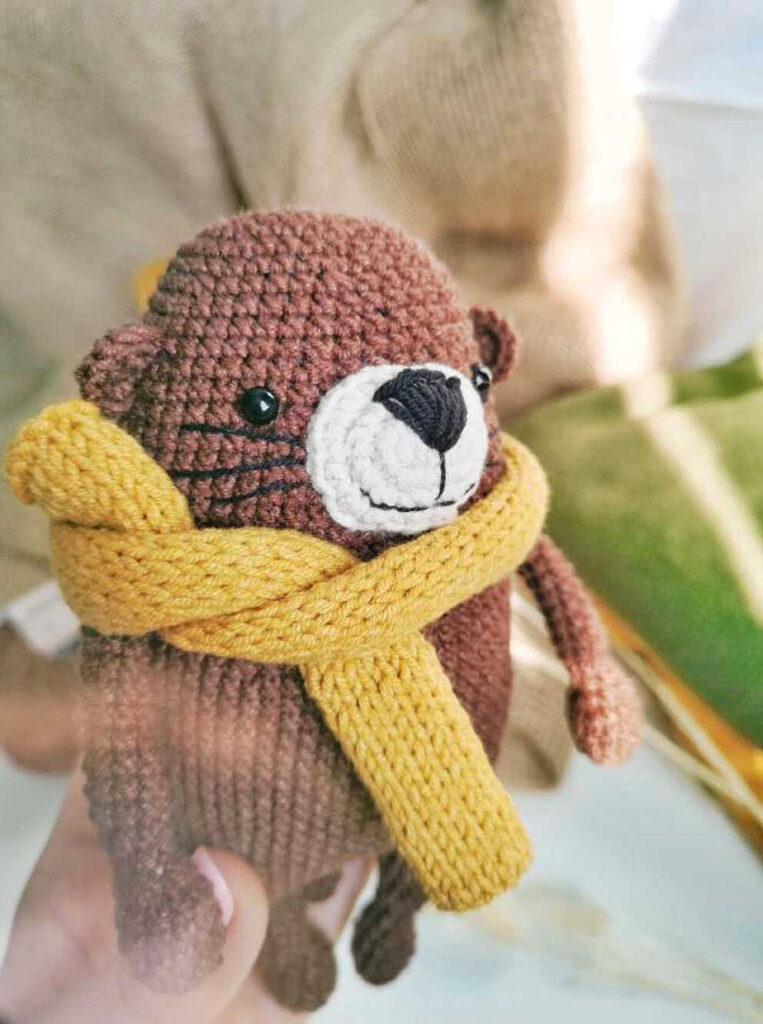
– Sew the muzzle between the eyes and fill it slightly so that it protrudes slightly forward. A nose is embroidered on the face, as shown in the photo. To decorate the mouth and mustache, I separate a thin thread from the main thick thread, and embroider the elements with it. This makes them more accurate and more consistent with the size of the toy.
Advice: do not try to sew everything exactly to the millimeter, in the case of amigurumi toys this is almost unrealistic, since the rows go in a spiral. And if my recommendations for the exact location of the parts of the toy go against your vision, then do as you see fit. After all, this is a creative process and each toy turns out to be unique.
– The ears should be located between 34 and 36 rows of the body, approximately at a distance of 6 single crochet from the peephole (we also first outline their position with pins). Sew the tail back between the 14th and 15th rows of the body.
It remains to knit a scarf and your Bruno is ready!
More amigurumi otter ideas:


