Cute Robot Fairy Amigurumi Free Crochet Pattern
Designer: Melody of Moonlight Workshop
Instagram: @ann_the_amigurumer
Difficulty Level: Intermediate
A whimsical fantasy amigurumi designed to bring playful handmade creativity to your crochet time.
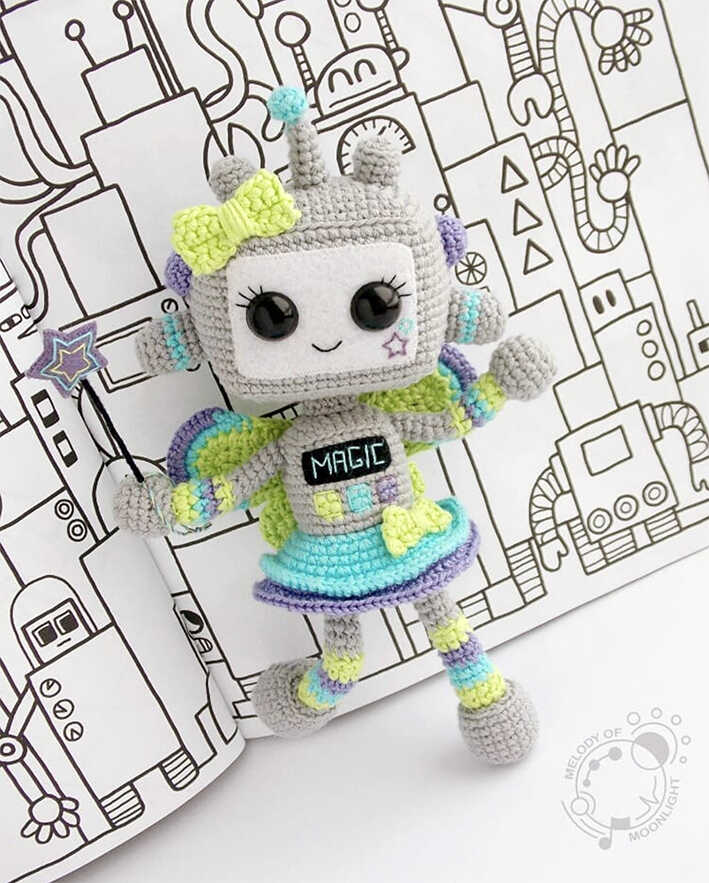
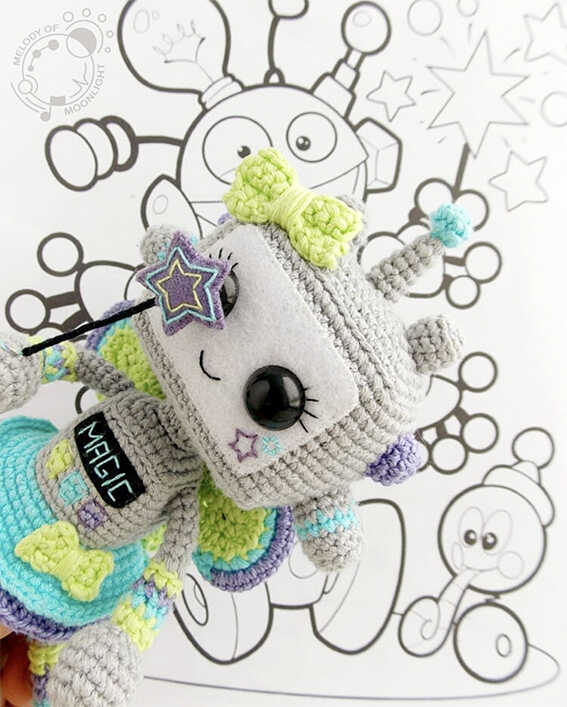
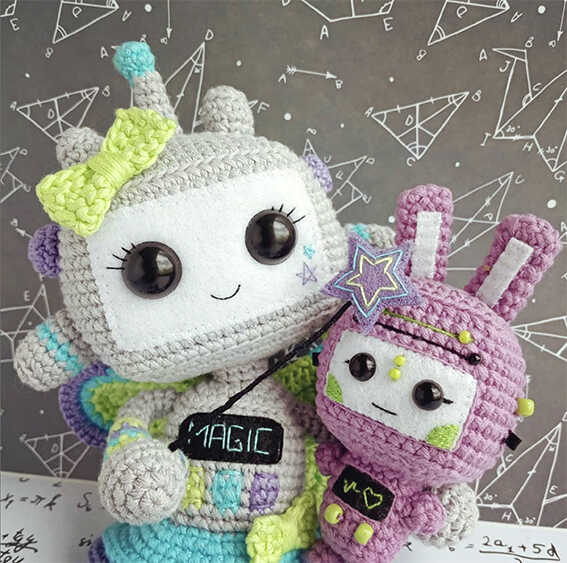
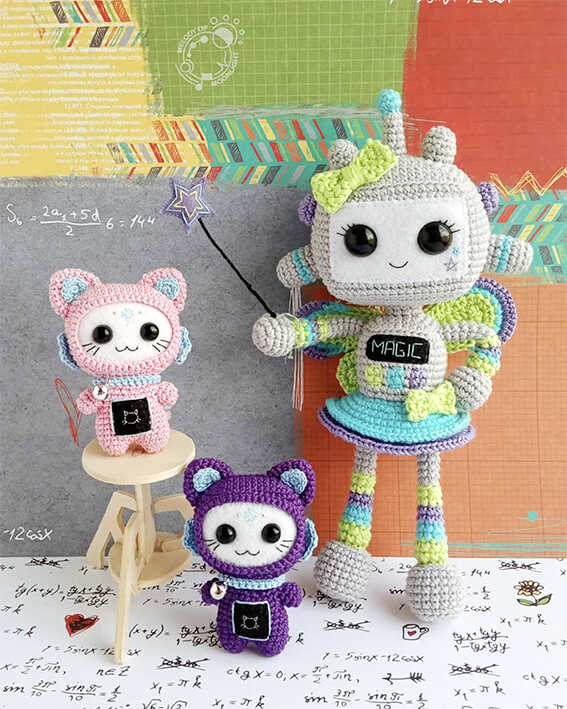
This free robot fairy amigurumi pattern is designed by Melody of Moonlight Workshop and introduces the imaginative character “Robotessa-Feya.” Blending robotic details with fairy-inspired charm, the doll creates a unique handmade project perfect for DIY Crochet Gift Ideas, desk decor, or collectible fantasy toys. Decorative elements and colorful yarn choices give the character personality and charm. You will also find inspiring amigurumi robot doll ideas shared at the end of the pattern, and we sincerely thank Melody of Moonlight Workshop for sharing this creative design with the crochet community.
Interested in making this magical character yourself? Scroll further down the page to find the original crochet pattern source.
This project follows an intermediate amigurumi structure with more detailed shaping and decorative assembly. Difficulty Level: Intermediate. The doll uses four yarn colors—gray, light green, turquoise, and lilac—to create its playful robot fairy appearance. If you enjoy imaginative handmade characters, you may also like our amigurumi frog pattern.
The design works best with semi-cotton yarn and a crochet hook suitable for the yarn weight. You will also need stuffing material, scissors, and a sewing needle. Eyes can be made with buttons, beads, or safety eyes, while optional felt, beads, and wire can add extra decorative structure. For another creative fantasy project, explore our amigurumi dragon pattern.

Materials
• Yarn (4 colors)
▪︎ gray
▪︎ light green
▪︎ turquoise
▪︎ lilac
• Crochet hook suitable for the yarn
• Stuffing material
• Scissors
• Sewing needle
• Eyes (buttons, beads, or safety eyes)
• Decorative elements (buttons, beads, seed beads, etc.)
• Felt for face and other details (optional)
• Wire for inner frame (optional)
Abbreviations
ch – chain
sc – single crochet
sl st – slip stitch
hdc – half double crochet
MR – magic ring
BLO – back loop only
FLO – front loop only
inc – increase (2 stitches in one stitch)
inc2 – double increase (3 stitches in one stitch)
dec – decrease (2 stitches together)
dec2 – double decrease (3 stitches together)
(…) x n – repeat n times
CUTE ROBOT DOLL AMIGURUMI PATTERN
Head
Use gray yarn.
Ch 7+1. Start in the second ch from hook.
R1: 6 sc, 3 sc in one stitch, turn and continue along the other side of the chain: 5 sc, inc (16)
R2: (inc2, 5 sc, inc2, 1 sc) x 2 (24)
R3: (1 sc, inc2, 7 sc, inc2, 2 sc) x 2 (32)
R4: (2 sc, inc2, 9 sc, inc2, 3 sc) x 2 (40)
R5: (3 sc, inc2, 11 sc, inc2, 4 sc) x 2 (48)
R6: (4 sc, inc2, 13 sc, inc2, 5 sc) x 2 (56)
R7: (5 sc, inc2, 15 sc, inc2, 6 sc) x 2 (64)
R8: BLO: 64 sc
R9–R21: 64 sc (13 rounds)
R22: BLO: (5 sc, dec2, 15 sc, dec2, 6 sc) x 2 (56)
R23: (4 sc, dec2, 13 sc, dec2, 5 sc) x 2 (48)
R24: (3 sc, dec2, 11 sc, dec2, 4 sc) x 2 (40)
R25: (2 sc, dec2, 9 sc, dec2, 3 sc) x 2 (32)
Insert the eyes if needed. Start stuffing.
R26: (1 sc, dec2, 7 sc, dec2, 2 sc) x 2 (24)
R27: (dec2, 5 sc, dec2, 1 sc) x 2 (16)
R28: 1 sl st, (5 sc, dec2) x 2
Fasten off and leave a long tail for sewing the opening.
If a neat rectangular shape is difficult to achieve, finish at round 21 and crochet the bottom separately (rounds 1–7) and sew it.
Head Details
Antenna (1 piece)
Start with turquoise yarn.
R1: 6 sc in MR (6)
R2: (inc, 1 sc) x 3 (9)
Stuff lightly.
R3: (dec, 1 sc) x 3 (6)
Switch to gray yarn.
R4: FLO: 6 sc
R5–R6: 6 sc
R7: inc, 5 sc (7)
R8: 3 sc, inc, 3 sc (8)
R9: 7 sc, inc (9)
Fasten off leaving a long tail for sewing.
Detail 1 (2 pieces)
Gray yarn.
R1: 6 sc in MR (6)
R2: inc x 6 (12)
R3: BLO: 12 sc
R4: 12 sc
Switch to turquoise yarn.
R5: 12 sc
Switch to gray yarn.
R6–R7: 12 sc
Fasten off leaving a long tail.
Detail 2 (2 pieces)
Lilac yarn.
R1: 6 sc in MR (6)
R2: inc x 6 (12)
R3: 12 sc
Fasten off leaving a long tail.
Detail 3 (2 pieces)
Gray yarn.
R1: 5 sc in MR (5)
R2: inc x 5 (10)
R3: BLO: 10 sc
R4–R5: 10 sc
Fasten off leaving a long tail.
Body
Start with gray yarn. Close each round with sl st.
R1: 6 sc in MR, sl st (6)
R2: ch 1, 1 sc, inc x 5, sl st (11)
R3: ch 1, BLO: 11 sc, sl st
R4: ch 1, 11 sc, sl st
R5: ch 1, FLO: 1 sc, inc2, (2 sc, inc2) x 3, sl st (19)
R6: ch 1, 2 sc, inc2, (4 sc, inc2) x 3, 1 sc, sl st (27)
R7: ch 1, 3 sc, inc2, (6 sc, inc2) x 3, 2 sc, sl st (35)
R8: ch 1, BLO: 35 sc, sl st
R9–R12: ch 1, 35 sc, sl st (4 rounds)
R13–R14: ch 1, 13 sc gray, 2 sc light green, 1 sc gray, 2 sc turquoise, 1 sc gray, 2 sc lilac, 14 sc gray, sl st (35)
R15–R16: ch 1, 35 sc, sl st
R17: ch 1, BLO: 2 sc, dec2, (6 sc, dec2) x 3, 3 sc, sl st (27)
R18: ch 1, 1 sc, dec2, (4 sc, dec2) x 3, 2 sc, sl st (19)
Start stuffing.
R19: ch 1, dec2, (2 sc, dec2) x 3, 1 sc (11)
R20: ch 1, dec x 6 (6)
Fasten off and hide the yarn.
Skirt
Attach turquoise yarn to the remaining loops between rounds 16 and 17.
R1: 36 sc
R2: (3 sc, inc) x 9 (45)
R3: 45 sc
R4: (4 sc, inc) x 9 (54)
R5: 54 sc
R6: FLO: (2 sc, inc) x 18 (72)
Attach lilac yarn.
R6′: BLO: 54 sc
R7′: (1 hdc, 2 hdc in one stitch) x 27 (81)
Arms
Detail 1 (2 pieces)
Light green yarn.
Ch 8 and join in a ring.
R1: 8 sc
Turquoise yarn.
R2: 8 sc
Lilac yarn.
R3: 8 sc
Light green yarn.
R4: dec, 6 sc (7)
Gray yarn.
R5: BLO: 7 sc
R6–R10: 7 sc
Fasten off leaving a tail.
Detail 2 (2 pieces)
Gray yarn.
R1: 5 sc in MR (5)
R2: inc x 5 (10)
R3: (1 sc, inc) x 5 (15)
R4–R6: 15 sc
R7: (1 sc, dec) x 5 (10)
Stuff.
R8: dec x 5 (5)
Fasten off.
Legs
Detail 1 (2 pieces)
Light green yarn.
Ch 10 and join.
R1: 10 sc
R2: dec, 8 sc (9)
Turquoise yarn.
R3–R4: 9 sc
Lilac yarn.
R5–R6: 9 sc
Light green yarn.
R7: dec, 7 sc (8)
R8: 8 sc
Gray yarn.
R9: BLO: 8 sc
R10–R18: 8 sc
Fasten off leaving a tail.
Detail 2 (2 pieces)
Gray yarn.
R1: 6 sc in MR, sl st (6)
R2: ch 1, 1 sc, inc x 5, sl st (11)
R3: ch 1, 1 sc, inc2, (2 sc, inc2) x 3, sl st (19)
R4: ch 1, BLO: 19 sc, sl st
R5–R9: ch 1, 19 sc, sl st
R10: ch 1, BLO: 1 sc, dec2, (2 sc, dec2) x 3, sl st (11)
Stuff.
R11: ch 1, dec2 x 4, sl st (4)
Fasten off.
Wings
Detail 1 (2 pieces)
Light green yarn.
Ch 6+1.
R1: 4 sc, 1 hdc, 4 hdc in one stitch; continue on the other side: 1 hdc, 4 sc (14)
Turn.
R2: ch 1, 4 sc, 1 hdc, (2 hdc in one stitch) x 4, 1 hdc, 4 sc (18)
Fasten off leaving a tail.
Detail 2 (2 pieces)
Light green yarn.
Ch 10+1.
R1: 6 sc, 3 hdc, 4 hdc in one stitch; continue: 3 hdc, 6 sc (22)
R2: ch 1, 4 sc, 3 sc, 2 hdc, (2 hdc in one stitch) x 4, 2 hdc, 3 sc, 4 sc (26)
R3: ch 1, 8 sc; turquoise yarn: 1 sc, inc x 8, 1 sc; light green yarn: 8 sc (34)
R4: ch 1, 8 sc; turquoise: 3 sc; lilac: (inc, 1 sc) x 6; turquoise: 3 sc
Fasten off.
Bows
Large bow
Ch 8+1.
R1: 8 sc
R2–R4: ch 1, 8 sc
Small bow
Ch 5+1.
R1: 5 sc
R2–R3: ch 1, 5 sc
Wrap yarn around the center to shape the bow.
Assembly
- A wire frame can be added but is optional. Without it the toy will be soft and flexible. Reinforcing the neck is recommended.
- Close the opening of the head and sew the head to the body. Decorate the face with felt if desired. Sew the antenna and other head details.
- Attach arms and legs.
- Sew the wings to the back (large above, small below).
- Use bows to decorate the head and skirt. Buttons, beads, or a small “screen” can be added to the body.
Copyright & Credits
This pattern is designed by Melody of Moonlight Workshop. You may sell finished toys made from this pattern, but the pattern itself may not be copied, shared, redistributed, or republished in any form without permission. Please credit the designer by linking to instagram.com/ann_the_amigurumer when sharing your work.