Easy Baby Dragon Amigurumi Free Crochet Pattern
Designer: Tatiana Sokolova
VK: @tatsok_toys
Difficulty Level: Intermediate
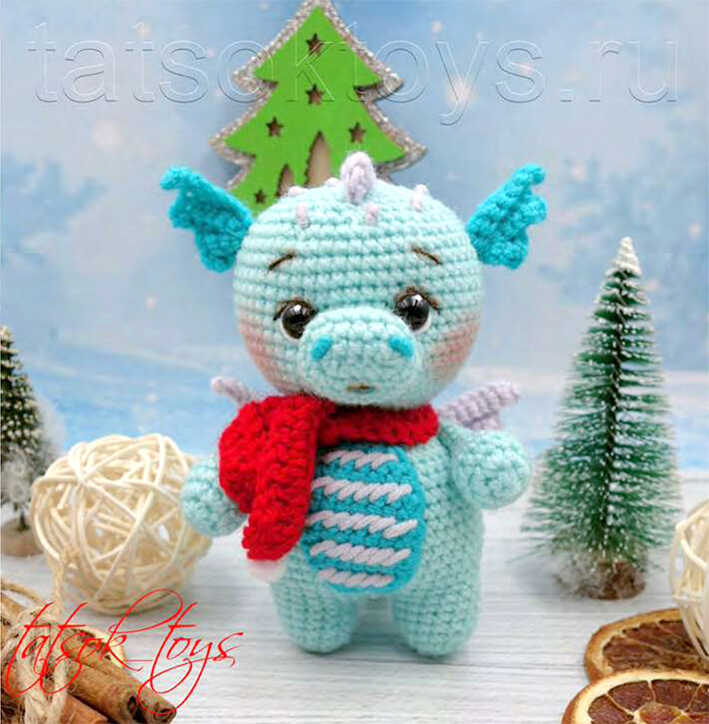
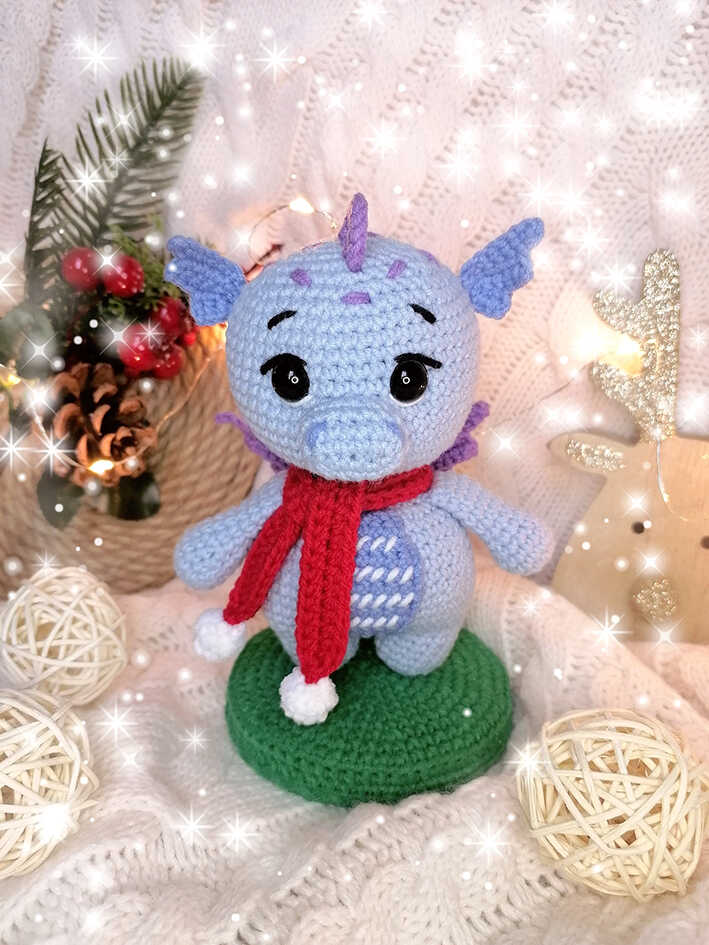
Let’s bring a tiny dragon to life with a cozy crochet moment.
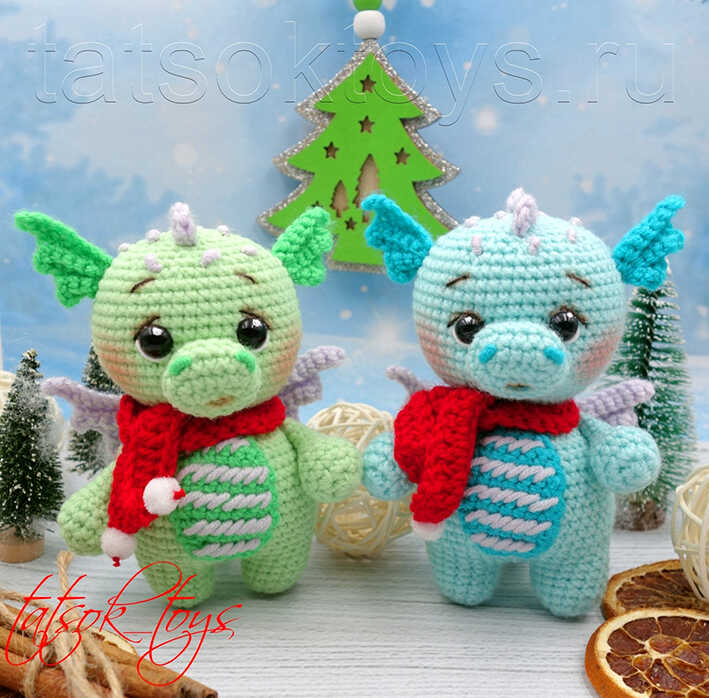
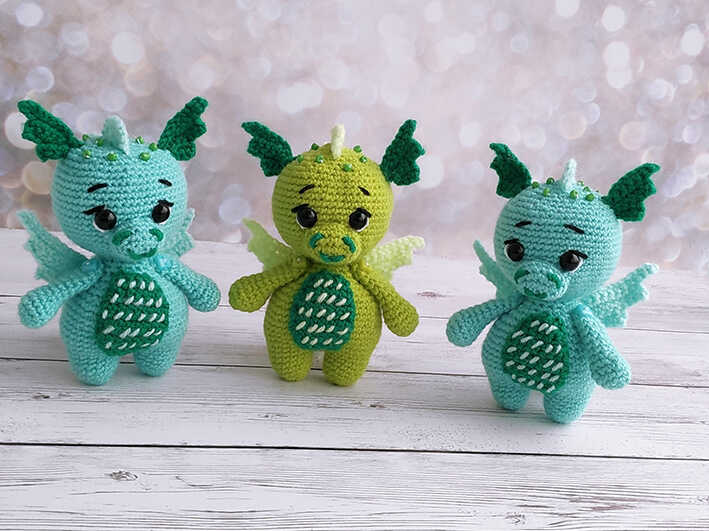
The Easy Baby Dragon Amigurumi Free Crochet Pattern is a playful handmade project inspired by soft fantasy characters and gentle nursery toys. This small dragon works well as shelf décor, a baby room accent, or a cute option for DIY Crochet Gift Ideas. It also fits perfectly into Easy Crochet Projects and Low Sew Amigurumi Patterns thanks to its simple structure. After the main instructions, you’ll also find fun amigurumi dragon ideas to explore different looks. Many thanks to Tatiana Sokolova for designing and sharing this lovely pattern.
This amigurumi dragon pattern is best suited for crocheters who already know basic stitches and shaping. The instructions are written in a clear, step by step format, and the parts come together smoothly. It is a Quick to Make Amigurumi for confident beginners and intermediate makers. If you enjoy learning how to crochet amigurumi figures with simple shaping but more detailed finishing, this project offers a satisfying and fun experience. Difficulty Level: Intermediate.
The finished dragon is about 11 cm tall and uses lightweight yarn, a 1.9 mm crochet hook, safety eyes, fiberfill stuffing, and simple embroidery details. Cotton yarn gives clean stitches and sharp definition. Velvet yarn can also be used for a chunky plush version, but the toy will turn out much larger and softer. If you enjoy small fantasy projects like this, you may also like the Mini Crochet Dinosaur for similar inspiration.
Abbreviations
MR – magic ring
ch – chain
sc – single crochet
dc – double crochet
inc – increase (work 2 single crochet stitches into the same stitch)
dec – decrease (single crochet 2 stitches together)
sl st – slip stitch
yo – yarn over
(…) x n – repeat the instructions in parentheses n times
Materials
• Pekhorka Detskaya Obemnaya
- 41 (light green) – body
• Lilac color yarn - wings and spikes
• Pekhorka Detskaya Novinka - 65 (exotic) – mouth and nostrils embroidery
• 5 mm screw safety eyes
• 1.9 mm crochet hook
• Fiberfill stuffing
• Black Iris thread – eyebrows and eye lines
• Sewing needle
Finished size: 11 cm
EASY BABY DRAGON AMIGURUMI FREE CROCHET PATTERN
Legs – Body – Head
Important: In this pattern, the legs, body, and head are worked as one continuous piece.
The body does not have a separate section or heading. It begins immediately after the legs are joined and continues seamlessly into the head.
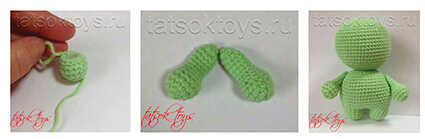
Legs
Pekhorka Detskaya Obemnaya yarn 41 (light green), 1.9 mm crochet hook
R1: 6 sc in MR (6)
R2: 6 inc (12)
R3: (3 sc, inc) x 3 (15)
R4–R6: 15 sc (15)
Fasten off and cut yarn. Make the second leg the same, but do not cut the yarn.
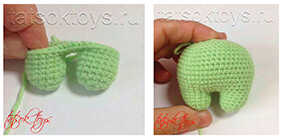
Note: The body is worked continuously after joining the legs. Do not cut the yarn.
Continue crocheting the body. Join the legs.
R7: ch 2, 15 sc on the first leg, 2 sc in ch, 15 sc on the second leg, 2 sc in ch (34)
R8: 15 sc, 2 inc, 17 sc (36)
R9: (5 sc, inc) x 6 (42)
R10: 3 sc, inc, (6 sc, inc) x 5, 3 sc (48)
R11–R13: 48 sc (48)
R14: (14 sc, dec) x 3 (45)
R15: 45 sc (45)
R16: (13 sc, dec) x 3 (42)
R17: 42 sc (42)
R18: (12 sc, dec) x 3 (39)
R19: 39 sc (39)
R20: 10 sc, dec, (3 sc, dec) x 4, 7 sc (34)
R21: 8 sc, dec, (1 sc, dec) x 6, 6 sc (27)
R22: dec, 3 sc, (2 sc, dec) x 5, 2 sc (21)
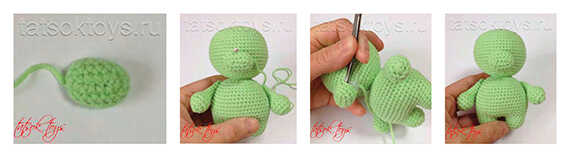
Place stuffing.
R23: (dec, 1 sc) x 3, dec, 4 sc, (dec, 1 sc) x 2 (15)
R24: 15 sc (15)
Add more stuffing and continue crocheting the head.
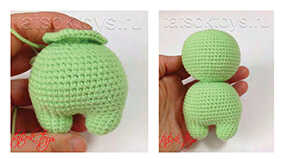
Head
R25: 15 inc (30)
R26: 2 sc, inc, (4 sc, inc) x 5, 2 sc (36)
R27: (5 sc, inc) x 6 (42)
R28: 3 sc, inc, (6 sc, inc) x 5, 3 sc (48)
R29: (7 sc, inc) x 6 (54)
R30–R39: 54 sc (54)
R40: (7 sc, dec) x 6 (48)
R41: 3 sc, dec, (6 sc, dec) x 5, 3 sc (42)
R42: (5 sc, dec) x 6 (36)
R43: 2 sc, dec, (4 sc, dec) x 5, 2 sc (30)
Place stuffing.
R44: (3 sc, dec) x 6 (24)
R45: 1 sc, dec, (2 sc, dec) x 5, 1 sc (18)
R46: (1 sc, dec) x 6 (12)
Place stuffing.
R47: 6 dec (6)
Pull the opening closed, fasten off, cut yarn and hide the tail.
Arms (2 pcs)
R1: 6 sc in MR (6)
R2: 6 inc (12)
R3: (3 sc, inc) x 3 (15)
R4: 15 sc (15)
R5: (3 sc, dec) x 3 (12)
R6: (4 sc, dec) x 2 (10)
Place a small amount of stuffing into the hand.
R7–R12: 10 sc (10)
R13: 5 dec (5)
Pull the opening closed and cut yarn.
Attach the arms using button joint method.
Muzzle
R1: ch 6, starting from the second ch from the hook: 4 sc, 3 sc in the last ch, on the other side 3 sc, inc (12)
R2: inc, 3 sc, 3 inc, 3 sc, 2 inc (18)
R3–R4: 18 sc (18)
Leave yarn for sewing and cut.
Sew the muzzle 14 rounds above the MR, adding a small amount of stuffing.
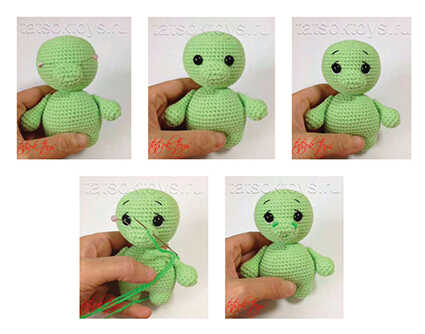
Face Details
Insert screw safety eyes.
Distance between pins: 8 sc, distance between eyes: 5 sc.
Embroider eye whites with white yarn.
Embroider eye lines and eyebrows with black Iris thread.
Embroider the mouth with Pekhorka Detskaya Novinka yarn 65 (exotic).
Using the same yarn, embroider nostrils with French knots.
Ears (2 pcs)
Work in rows, through back loops only.
R1: ch 8, starting from the second ch from the hook: 7 sc, ch 1, turn
R2: 5 sc, ch 1, turn
R3: 5 sc, ch 1, turn
R4: 3 sc, ch 1, turn
R5: 3 sc
Leave yarn for sewing and cut.
Pull the yarn through the first row, tighten and fasten off.
Attach the ears 8 sc away from the eyebrows, at the level of the lower edge.
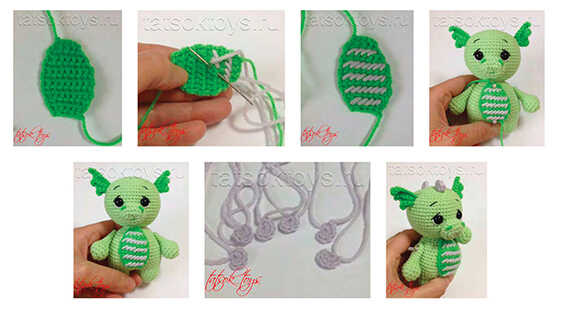
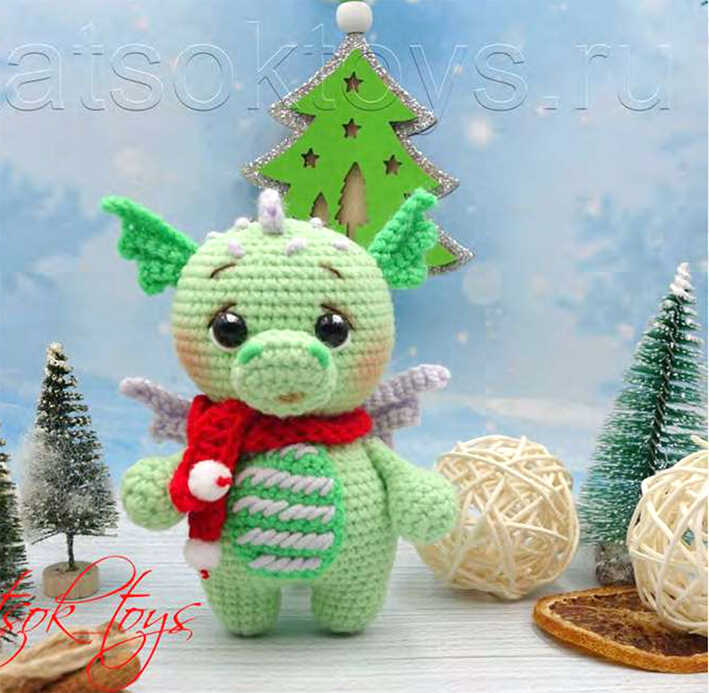
Chest Patch
Work in rows with turning chains.
R1: ch 5, starting from the second ch from the hook: 4 sc, ch 1, turn
R2: inc, 2 sc, inc, ch 1, turn
R3: 6 sc, ch 1, turn
R4: inc, 4 sc, inc, ch 1, turn
R5–R9: 8 sc, ch 1, turn
R10: dec, 4 sc, dec, ch 1, turn
R11: 6 sc, ch 1, turn
R12: dec, 2 sc, dec, ch 1, turn
Leave yarn for sewing and cut.
Using a lighter yarn, embroider diagonal stripes.
Sew the chest patch onto the belly.
Spikes (6 pcs)
6 sc in MR.
Tighten the ring, do not join.
Leave yarn for sewing and cut.
Sew the spikes starting 4 rounds above the eyebrows, between the ears, then continue along the head, body, and tail.

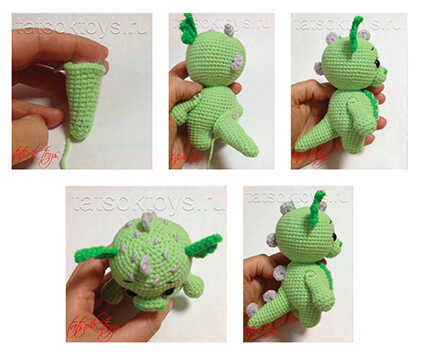
Tail
R1: 6 sc in MR (6)
R2: (2 sc, inc) x 2 (8)
R3: 8 sc (8)
R4: (3 sc, inc) x 2 (10)
R5: 10 sc (10)
R6: (4 sc, inc) x 2 (12)
R7: 12 sc (12)
R8: (5 sc, inc) x 2 (14)
R9: 14 sc (14)
R10: (6 sc, inc) x 2 (16)
R11: 16 sc (16)
R12: (7 sc, inc) x 2 (18)
R13: 18 sc (18)
R14: (8 sc, inc) x 2 (20)
R15: 5 sc, (1 sc, inc) x 5, 5 sc (25)
Leave yarn for sewing and cut.
Add stuffing and sew the tail to the back.
Head Decoration
Using lilac yarn, embroider French knots on the head in random order (4 wraps).
You can also embroider simple stitches instead.
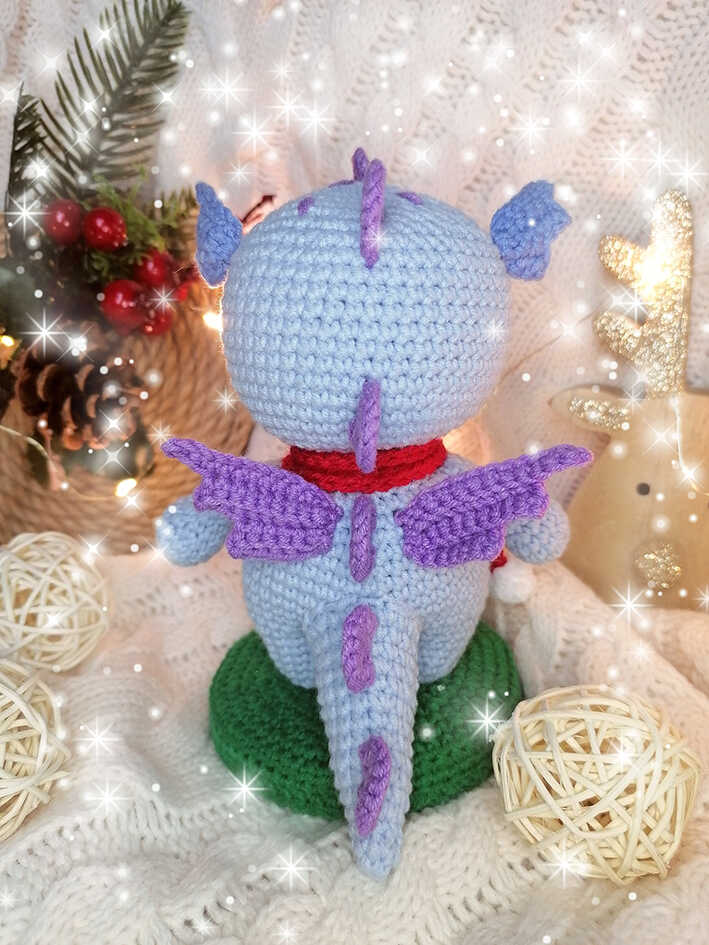
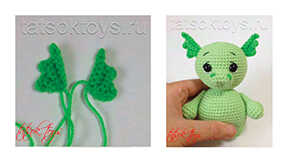
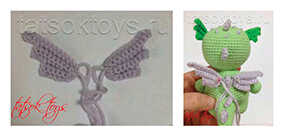
Wings (2 pcs)
Work in rows, through back loops only.
R1: ch 13, starting from the second ch from the hook: 12 sc, ch 1, turn
R2: 9 sc, ch 1, turn
R3: 9 sc, ch 1, turn
R4: 6 sc, ch 1, turn
R5: 6 sc
Leave yarn for sewing and cut.
Pull the yarn along the side edge, tighten and fasten off.
Sew the wings onto the back.
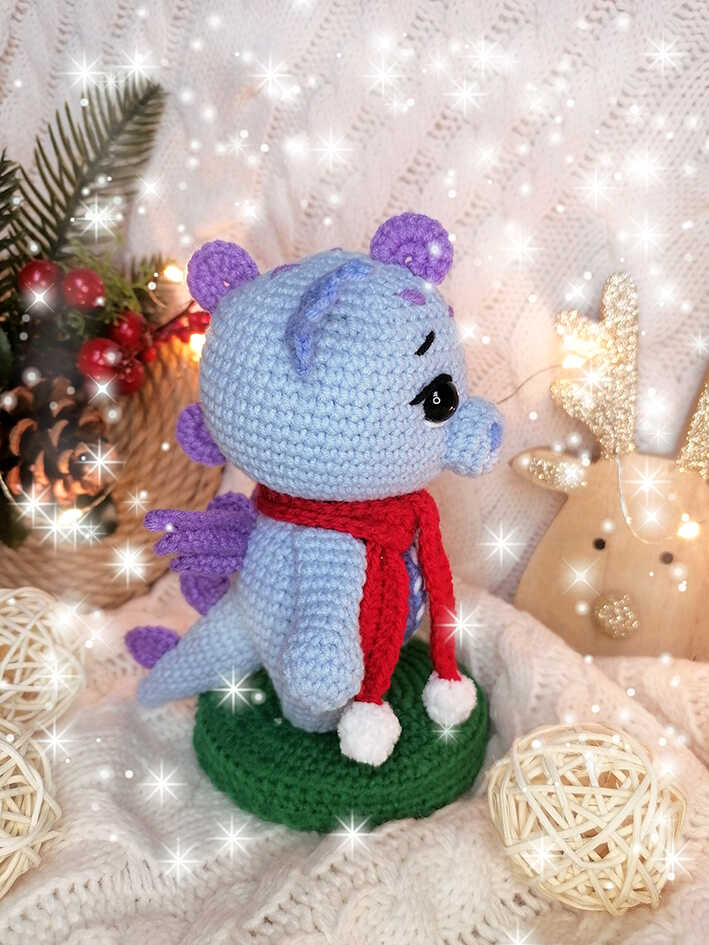
Scarf
R1: ch 50, starting from the third ch from the hook: 48 dc
Attach small pompoms to the ends.
Final Notes
Your little dragon is ready.
I look forward to seeing photos of your finished toys.
Copyright & Credits
Pattern design and original instructions by Tatiana Sokolova.
You may share photos of finished toys made from this pattern, provided you credit the designer.