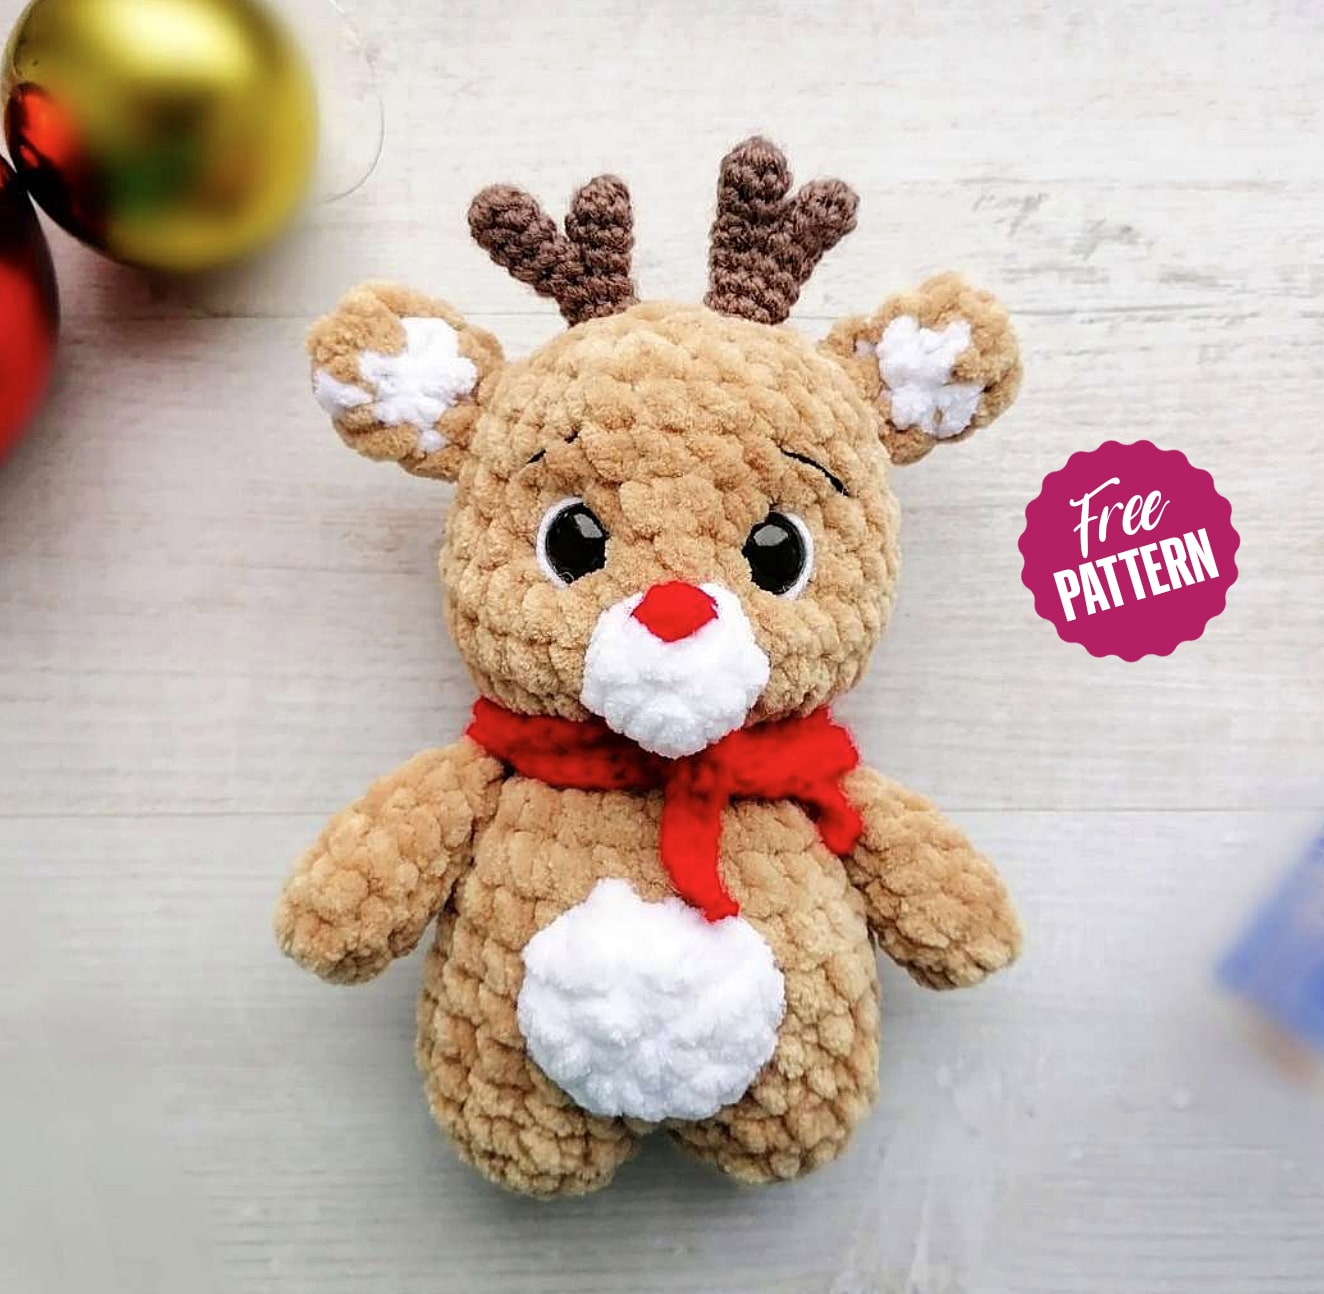
Amigurumi Plush Christmas Baby Deer Free Pattern
Hi there...
One of the free amigurumi crochet patterns we will share today is the amigurumi deer, whose photos and design belong to Anastasia Kudryashova. You can learn how to crochet these baby deer using the free amigurumi pattern. Thanks to Anastasia Kudryashova (@a.kudryashka95) for this cute deer.

If you don’t know how to often crochet and needles, read our shares. Start your knitting according to the rate you have according to the shape you will make. Shape your toy by increasing and decreasing the point. Once you weave the shape you want to fill the inside of your toy and look at the pictures to decorate.
Amigurumi cats, amigurumi dolls, amigurumi dogs, amigurumi unicorns, amigurumi lambs, amigurumi dinosaurs, amigurumi foxes, amigurumi bears, amigurumi giraffes, amigurumi pigs, amigurumi penguins, amigurumi panda, amigurumi llama, amigurumi bunny, amigurumi clowns, amigurumi elephants, amigurumi hippos, amigurumi monkeys will not be difficult for you…
Materials
• Plush yarn himalaya dolfin baby or yarnart dolce (Per 100gr-120m)
• half skein, base color ve Just a little bit of complementary color.
• Yarn – Pekhorka “children’s novelty” (50gr – 200m)
• I knitted the nose of the horns with Pekhorka yarn, children’s novelty, crochet # 2
• For knitting the Fawn you need hook number 4; No. 4.5. (I’m using # 4.5.)
• Mouline thread black for eyebrows. And a strong thread for decorating the face and fastening parts.
• secure attachment 12 mm.
• Filler – holofiber / synthetic fluff
• Needle with large stitching eye.
• scissors
• Marker
Abbreviations
sc – single crochet
inc – increase
dec – decrease
sl-st – connecting post.
Do not forget to fill the toy as you knit!
We knit the fawn from the legs with the transition into the body.
AMIGURUMI PLUSH BABY DEER CROCHET FREE PATTERN
Leg
1) 6 sc into magic ring
2) 6 increments (12)
3) 12 sc.
We knit the second leg in the same way, we connect it with the first leg with a single crochet. Here we put a marker ve and start knitting the first row
Body
1) 12 tane on the first leg, 12 sc on the second leg. (24)
2-6) 24 sc (5 rows)
7) (2 sc, dec) x 6 (18)
Do not forget to fill the product as tightly as possible.
8) (1 sc, dec) x 6 (12)
Here we go to the head.
9) (1 sc, inc) x 6 (18)
10) (2 sc, inc) x 6 (24)
11) (3 sc, inc) x 6 (30)
12-13) 30 sc (2 rows)
14) (3 sc, dec) x 6 (24)
15-16) 24 sc (2 rows)
17) (2 sc, dec) x 6 (18)
We fix the eyes between 14 and 15 next
18) (1 sc, dec) x 6 (12)
19) decreases to the end.
Arms
1) 6 sc into magic ring
2-5) no change 6 sc (4 rows)
6) 1 dec, 4 sc.
7) Decreases for both walls.
Ears
1) 6 sc into magic ring
2-3) 1 sc, change thread, 2 sc, change thread, 3 sc.
4) 1 sc, decrease for both walls, sl-st.
Tum
1) 6 sc, into magic ring
2) 6 increments. (12)
Leave the thread for sewing.
Muzzle
1) 6 sc into magic ring.
2) no changes 6 sc, sl-st.
Leave the thread for sewing.
Spout
Knit 6 sc into magic ring and sl-st.
Leave the thread for sewing to the muzzle.
Horns
1) 6 sc into magic ring
2-4) 6 sc. (3 rows)
So knit 2 details.
We will connect the following details.
1) 6 sc into magic ring
2-4) 6 sc. (3 rows)
We connect with a small piece, so that we get 9 sc in a row.
4-7) 9 sc (4 rows).
Leave the thread for sewing.
We sew on all the details and make a tightening in those places where the needles are inserted in the photo.
First, one eye, tighten at the bottom, then the second. So then we tighten it below. We hide the thread.
Scarf
Cast on 90 air loops, from the second loop from the hook in the opposite direction we knit single crochet. At the end of sl-st. Cut the thread and hide it.
